
You can add one patch to the whole tour, or a different patch to a single panorama. Every change saves as you make it; there’s no Save button to press. In the screenshots below, the coral numbers match the numbered steps.
Add a patch to every panorama in the tour
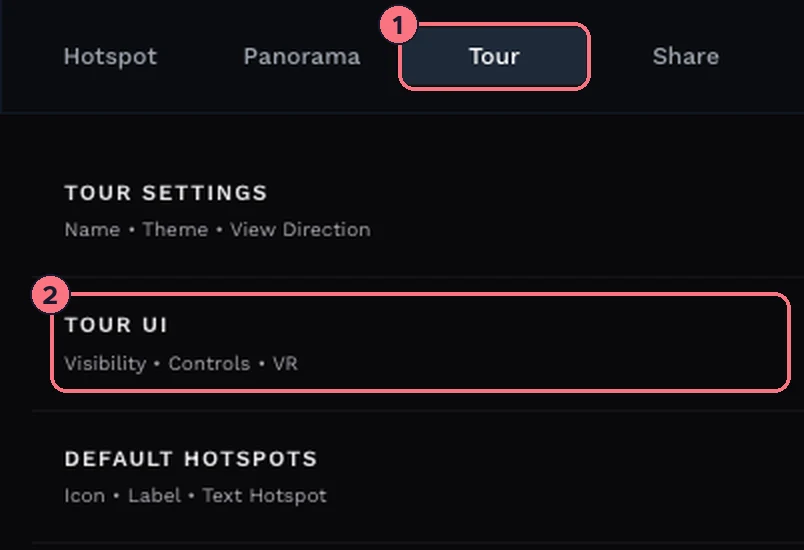
- Open your tour in the editor and choose the Tour tab in the right-hand panel.
- Open the Tour UI section and scroll down to Nadir, just below Sound.
- Choose + Add Nadir Image, then pick an image from Your Images or upload a new one. The patch appears at the bottom of every panorama, and its settings appear underneath.
Add a patch to just one panorama
Useful when one room needs a different patch, or when only some photos show the tripod.
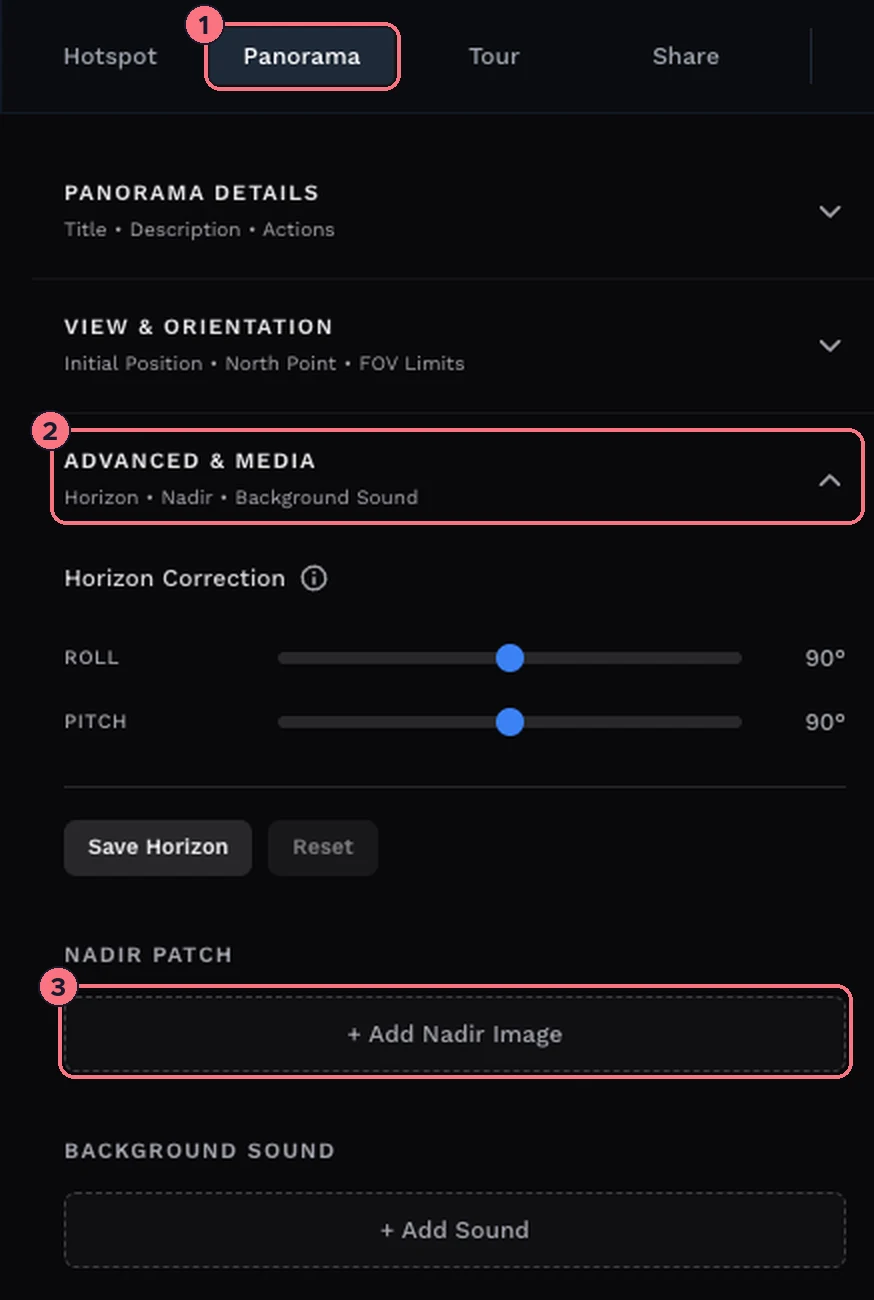
- Open the panorama in the editor and choose the Panorama tab.
- Open the Advanced & Media section. Nadir Patch sits between Horizon Correction and Background Sound.
- Choose + Add Nadir Image. The view turns to look straight down, so you can see the patch as you set it up. Pick or upload your image.
This panorama’s patch replaces the tour-wide one. If you remove it later, the tour-wide patch comes back.
Adjust the patch
The same settings appear in both places, under the patch image.
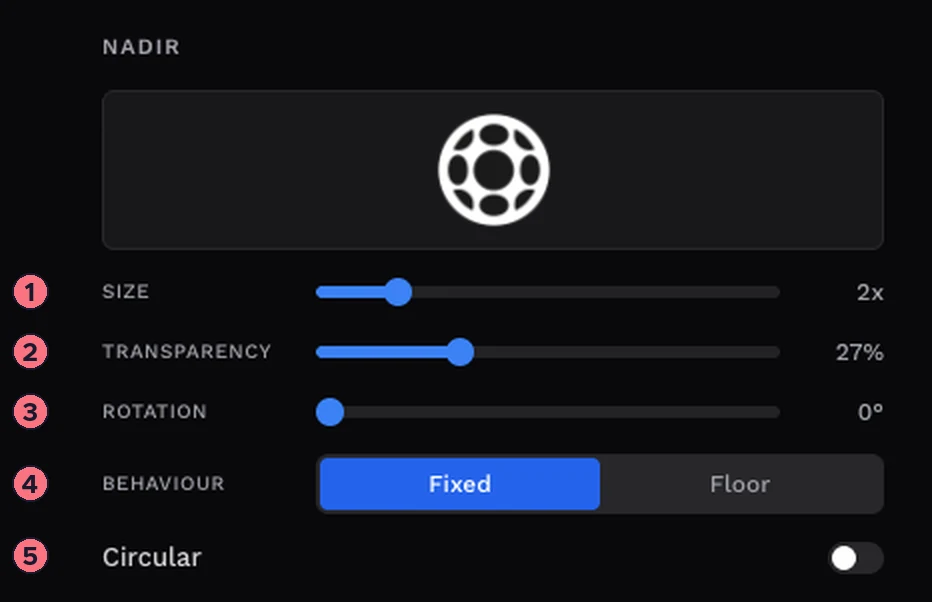
- 1. SizeFrom 0.5× to 10×. Make it just big enough to cover the tripod’s shadow.
- 2. TransparencyAt 0% the patch is solid. Slide it right, up to 90%, to let the floor show through.
- 3. RotationTurns the patch from 0° to 360°, so your logo reads the right way up from the direction people usually face.
- 4. BehaviourFixed (the default) keeps the patch the same way up on screen as the viewer turns. Floor locks it to the floor, so it turns with the room like a rug.
- 5. CircularCrops the patch to a circle. Turning it on adds Crop Zoom (100–200%), a Border (0–10px) with a Border Color, and a Circle Background colour that shows behind a transparent logo.
Change or remove the patch
Hover over the patch image above the settings:
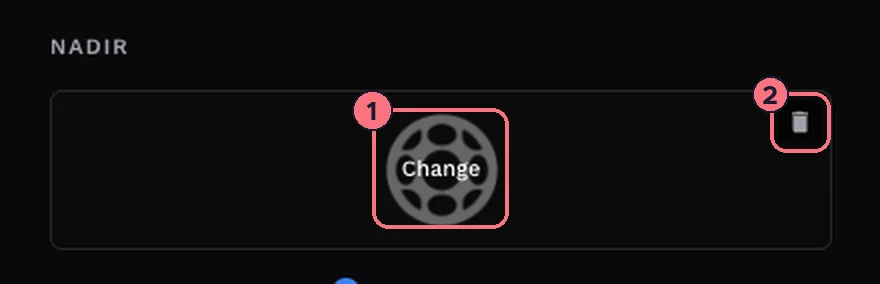
- Change appears over the image. It swaps the image and keeps your settings.
- The bin icon in the corner removes the patch. On a single panorama you’ll be asked to confirm, and the tour-wide patch (if you have one) takes its place.
Tips
- Use a square image. A logo with a transparent background works best, especially with Circular turned on.
- Check from a few directions. Use Preview and look down while turning around. With Fixed behaviour the logo always reads upright; with Floor it stays put like a sign painted on the floor.
- Hide the tripod in the photo itself if you can. A patch covers the spot, but a tripod shadow that stretches further than the patch will still show. Shooting with a slim monopod keeps the patch small.
Common questions
How do I hide or blur the tripod in a 360 photo?
In TeliportMe, cover it with a nadir patch: an image, usually your logo, placed over the spot straight below the camera. The patch covers the tripod rather than erasing it from the photo, so a long tripod shadow can still show around it.
Can I use my logo as a nadir patch?
Yes. A square logo with a transparent background works best. Turn on Circular to crop it to a circle, and set a Circle Background colour to show behind it.
Can each panorama have a different nadir patch?
Yes. Add a patch on the panorama’s Panorama tab, under Advanced & Media. It replaces the tour-wide patch on that panorama only.