
How many team members you can add depends on your plan. When they’re used up, adding someone offers an upgrade.
1. Your teammate makes an account
Each team member needs their own TeliportMe account first. Ask them to sign up with the email address you’ll add. TeliportMe doesn’t send them an invitation email, so let them know yourself.
2. Add them to your team
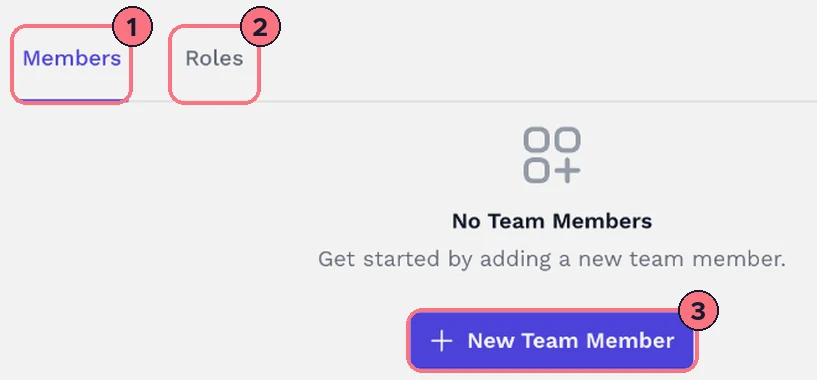
- In your dashboard, open Teams in the left menu. The Members tab (1) lists your team.
- Choose New Team Member (3), or Add Team Member at the top if you already have members.
- Type their email address, then type it again to confirm.
- Choose Add. “Account added” confirms they’re on your team. If they haven’t signed up with that email yet, a message says so instead.
3. Choose what they can do
- Choose Add Role at the top of the Teams page, or open the Roles tab (2).
- Under Select Email, pick the team member.
- Under Workspace, pick the workspace they’ll work in, or leave All (Default) for every tour on your account.
- Set their permissions:
- Edit ToursAlways on: they can open and change your tours.
- Create ToursThey can make new tours.
- Remove ToursThey can delete tours.
- Choose Save.
The Roles tab lists each person with their workspace and whether they can create and remove tours. Use Edit to change a role.
How team members work on your tours
A team member logs in to their own account and chooses Switch Team at the top of the Teams page, then picks your team. Their dashboard then shows your tours, within the workspace and permissions you gave them. To go back to their own tours, they choose Switch Team again and pick My Profile.
Only you, the team owner, can add people or change roles. A team member who opens Teams while working in your team sees a note saying so, with Switch to My Profile.
Remove someone
- From the team: on the Members tab, choose Delete next to them.
- Just their role: on the Roles tab, choose Delete next to it.
The page asks you to confirm either way.
Tips
- Didn’t show up? Check they signed up with exactly the email you typed; a different address or a typo won’t match.
- Working with clients or several offices? Put each one’s tours in a workspace and give people access to just that workspace.
Common questions
Does a team member need their own TeliportMe account?
Yes. They sign up with the email address you’ll add, then you add them on the Teams page. TeliportMe doesn’t send an invitation email, so tell them yourself.
Can I limit a team member to one client’s tours?
Yes. Put the client’s tours in a workspace and choose it under Workspace in the person’s role. All (Default) gives them every tour on your account.
Can team members delete my tours?
Only if you tick Remove Tours in their role. Every team member can edit tours, and Create Tours lets them make new ones.
What’s the difference between a team member and a sub-account?
A team member works inside your account, on your tours. A sub-account, on Agency plans, is a separate account for a client or reseller, with a share of your tours, brands, storage and custom domains.